
Stepping into the Living Lands in 2026 still feels as fresh as it did at launch, but one thing has never changed: if you don't keep your gear in top shape, the wilds will chew you up and spit you out. I've lost count of how many times I thought my lightning-shooting pistol would carry me through a fight, only to get flattened by a pack of enemies a couple of levels above me. It's a brutal wake-up call, but once you understand how upgrading and enchanting actually work, the entire experience shifts in your favor.
Finding your rhythm starts at camp. You can't just open your inventory anywhere and magically boost a sword. Instead, you need to set up your party camp by approaching one of those massive Adra pillars jutting out of the ground. Not every crystal works—only the ones marked on your map once discovered. The beauty here is the fast-travel system: you can zip to any camp site while exploring an open zone, and when you're done tinkering, you can instantly return to your previous location. That convenience is something I've come to rely on heavily. The moment I feel my damage falling off, I teleport back, handle my upgrades, and jump right back into the fray.
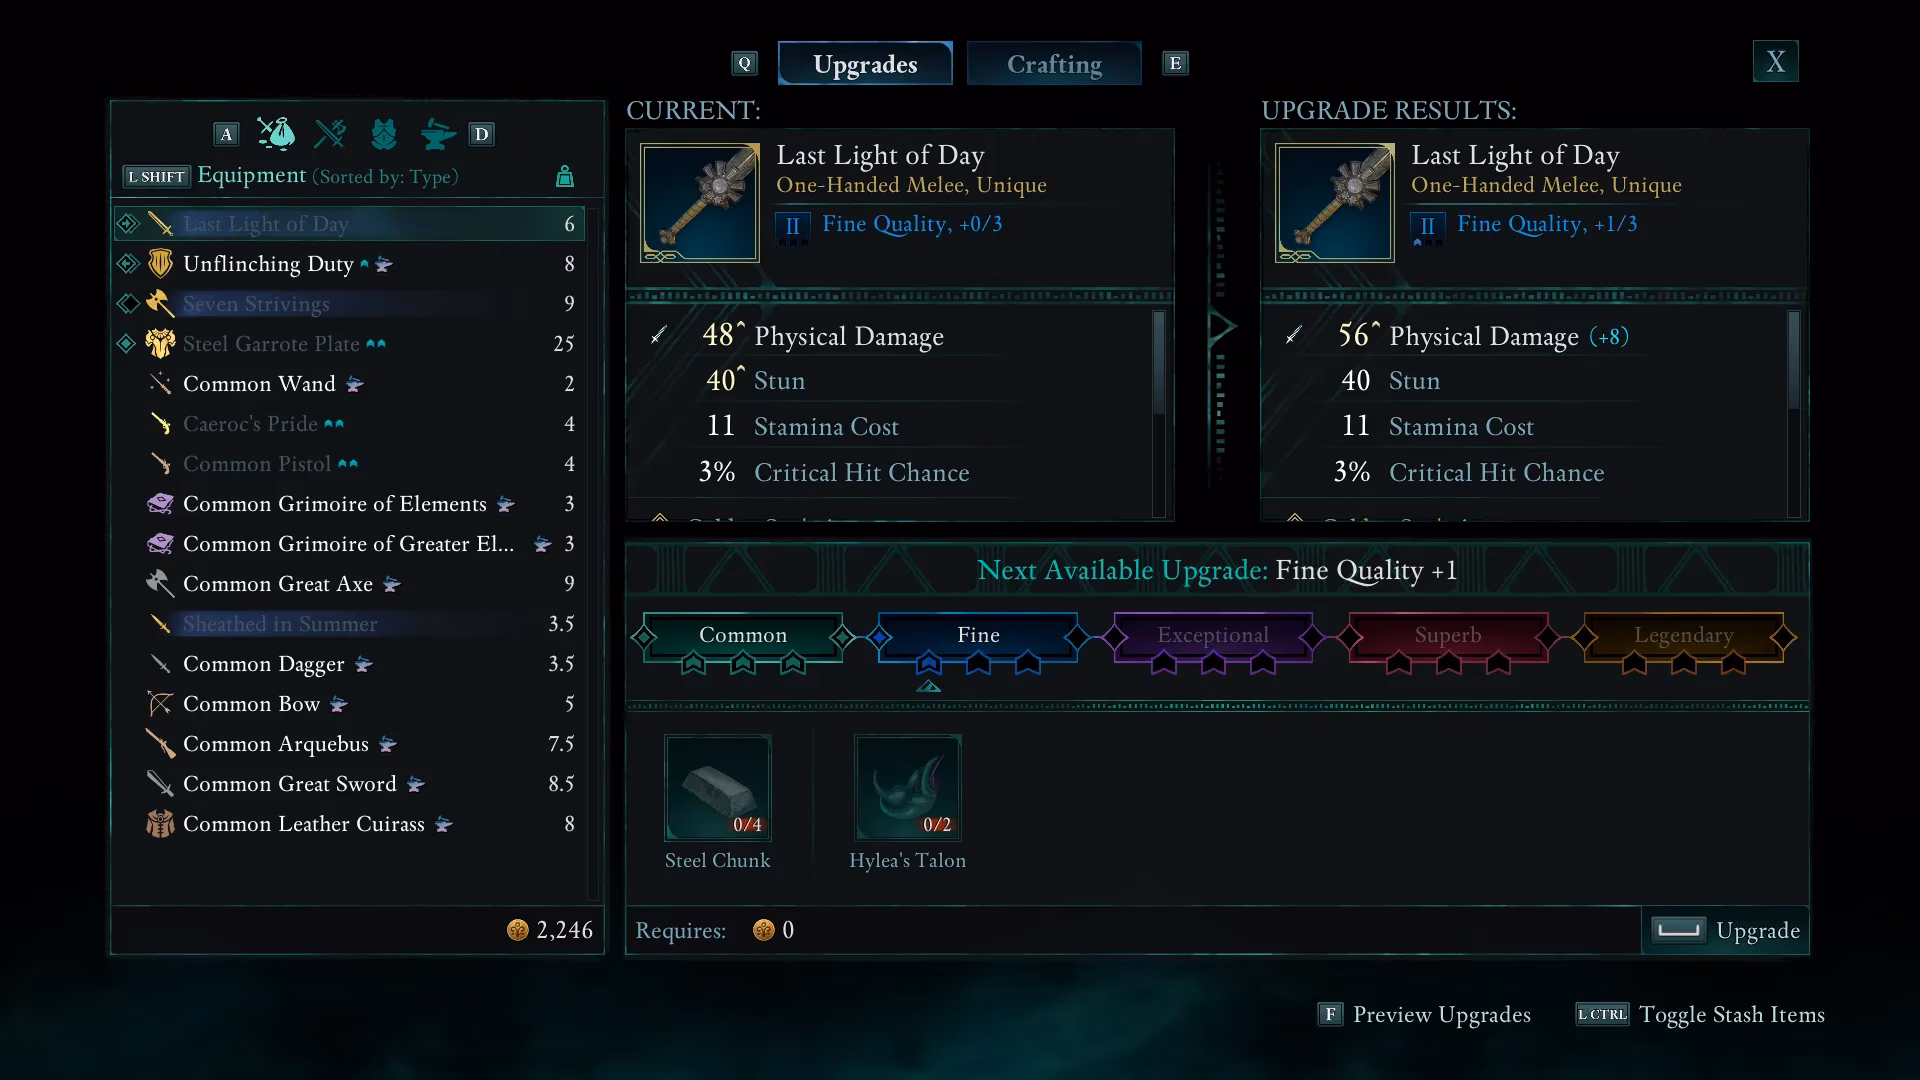
At camp, look for the small tent with an anvil. Interacting with it opens the upgrade menu, and this is where the magic happens. You'll pick a piece of gear—be it a trusty axe or a new set of leather armor—and feed it raw materials to boost its base stats. Have you ever wondered where all those piles of wood, metal scraps, and monster parts are supposed to go? This is exactly their purpose. You can gather materials by looting every corpse and container you see, buying stacks from merchants, or dismantling gear you no longer need. My rule of thumb is to break down anything that isn't labeled "Unique" unless I'm absolutely sure I'll use it later. That habit alone keeps my material reserves healthy.
Why does upgrading feel confusing at first? If you're like me, you probably missed or skimmed over the early tutorial pop-ups. The game doesn't beat you over the head with explanations, and suddenly you're staring at tier requirements wondering why your weapons barely scratch a two-skull enemy. The answer lies in the tier system. Each piece of equipment has a tier (Common, Fine, Exceptional, etc.), and to reach the next tier, you need to max out the current tier's upgrade levels first. Then a special crafting step requires a rarer material—often Adra Bán or similar—to push it over the threshold. After that, you can continue upgrading it further within the new tier. Without this progression, you'll be stuck hitting like a wet noodle. I learned that the hard way against a three-skull bounty target. So ask yourself: are you actually checking those tier-upgrade prerequisites, or are you just hoarding materials and hoping for the best?
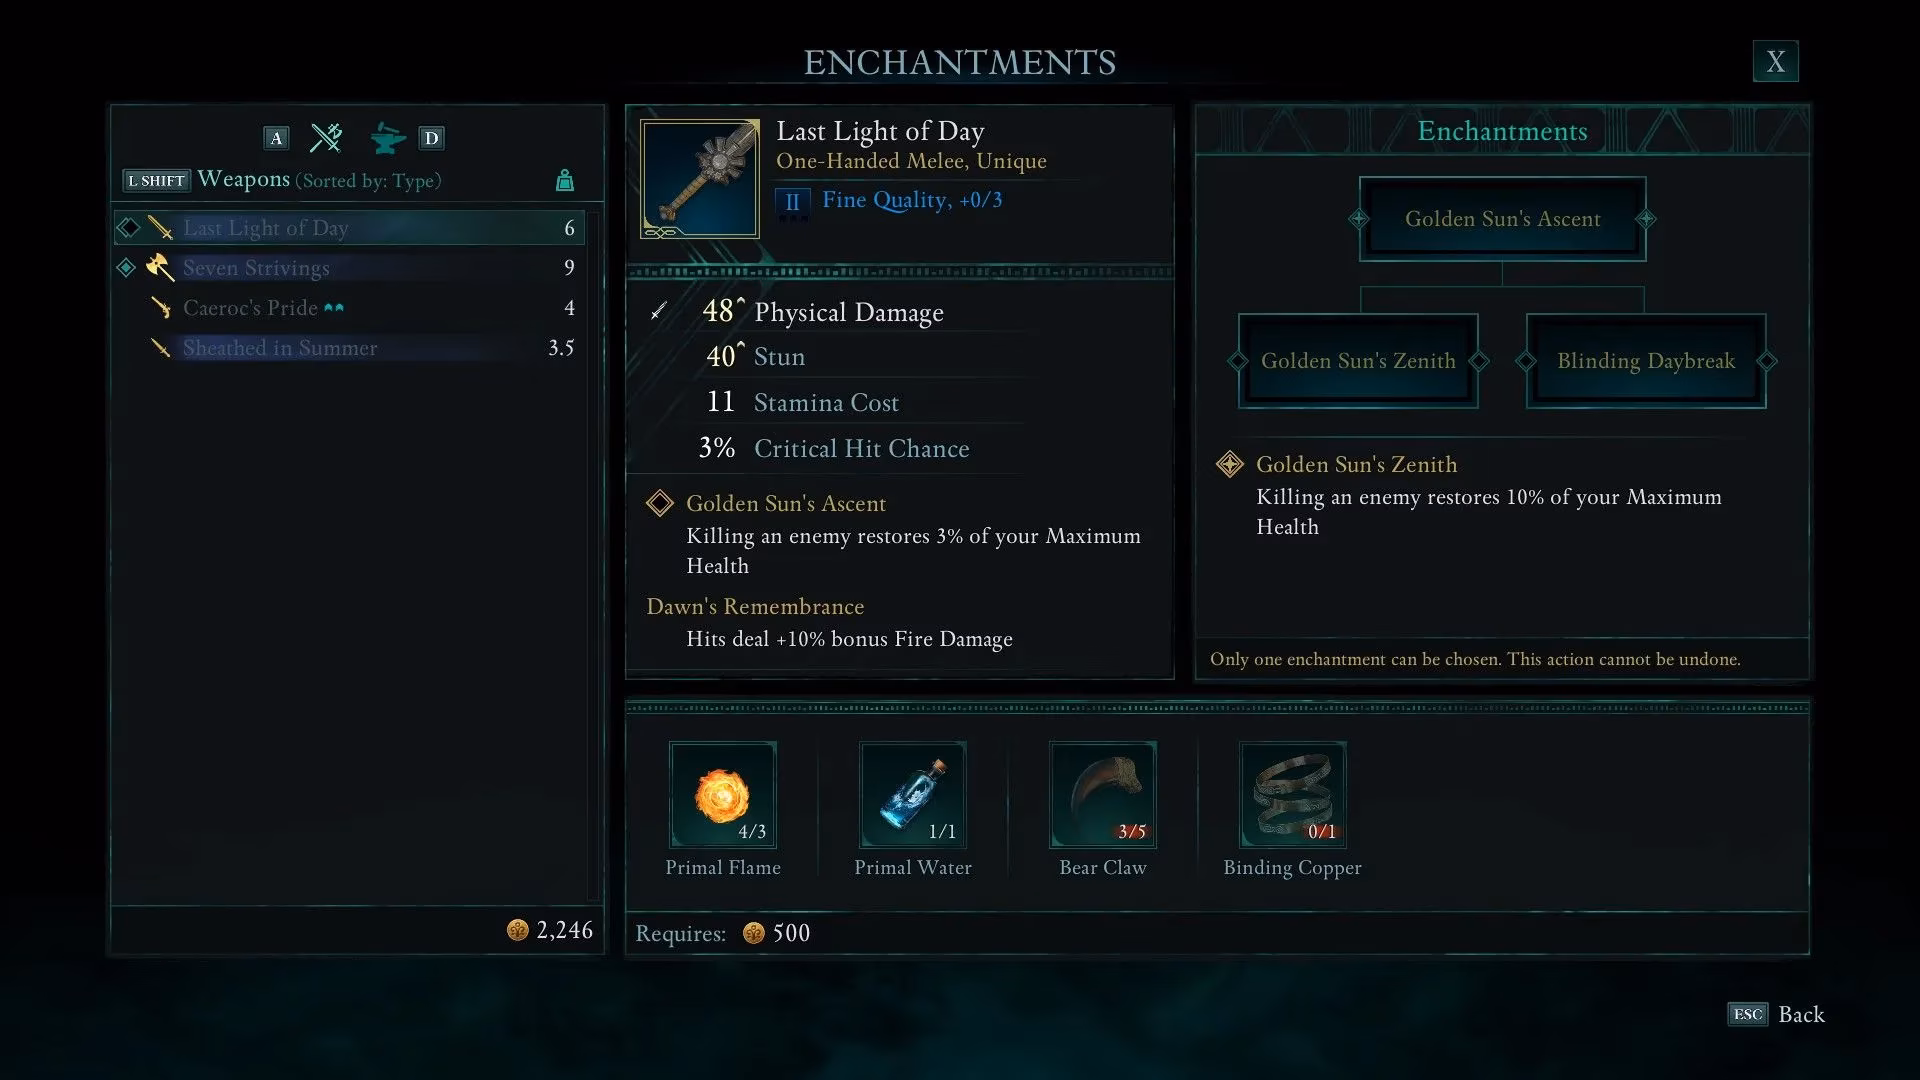
Unique equipment demands special attention. Right next to the upgrade tent sits the enchantment station. Regular upgrades improve raw damage and defense, but only the enchantment station can enhance the special perks of unique gear. And yes, you still have to upgrade a unique item through the standard anvil first—enchanting is an additional layer. I made the mistake of thinking enchanting alone would carry my Last Light of Day sword. It didn't. Once I properly upgraded its base form and applied an enchantment, the difference was night and day. Low-level enemies became one-shottable, and I could confidently dance with foes bearing two or even three skulls.
When you enchant a unique item, you're often presented with a choice. Take the Last Light of Day as an example. Its main enchantment can be improved to restore more health per kill, turning you into a self-sustaining whirlwind. Alternatively, you can select a completely different perk: one that delivers devastating Stun damage on a successful parry. Which one fits your playstyle better? I usually lean toward sustainability because I hate chugging potions, but if you're a parry god, the Stun route can trivialize shielded enemies. The resource cost for enchanting is steep—expect to burn through elemental essences and rare plants—so commit to a path that matches how you actually fight rather than a theoretical concept.
A streamlined upgrade checklist I follow now:
-
🏕️ Set camp at any discovered Adra pillar site and fast-travel freely.
-
🔨 Visit the anvil tent to upgrade all gear tiers and push through tier thresholds.
-
🪓 Break down weapons and armor you don't need, especially common drops. Don't hoard them for sale; gold is less valuable than materials early on.
-
✨ Use the enchantment station only for unique items and pick perks that synergize with your build.
-
🛒 Check merchants regularly for rare upgrade materials, but only buy what you absolutely need to cross a tier gap.
Has carrying underleveled gear ever made you rage-quit against a creature that should have been easy? I bet it has. The Living Lands don't care about your feelings. They'll throw higher-level threats at you constantly, and the only real answer is to methodically keep your favorite weapons and armor at or above the region's expected tier. Once I internalized that, the game opened up. Exploration became fun again, and I started seeking out tougher encounters instead of dreading them. So next time you feel underpowered, instead of blaming the enemies, walk back to camp, feed that anvil some materials, and come back carrying a blade that actually commands respect.
Comments