
In the vast and magical world of Avowed, many players are drawn to the spectacle of hurling fireballs or commanding otherworldly powers. Yet, even as of 2026, a path of raw physical prowess remains one of the most devastating and self-sufficient ways to conquer the Living Lands. This build rejects all forms of ranged weaponry and active magic, instead embracing the brutal elegance of pure melee combat. By focusing on the game's powerful stun mechanic and the extraordinary survivability granted by Temporary Health, a warrior can become an inexorable force capable of tearing through the hardest difficulty settings with almost reckless abandon.
Core Philosophy: The Art of Unkillable Offense
The philosophy behind this juggernaut is disarmingly simple: become so durable that defense becomes a form of offense. The build leverages two cornerstone abilities to create a feedback loop of constant pressure and near-invulnerability. Instead of dodging or parrying every blow, the fighter absorbs damage, generates a massive health shield, and regenerates lost vitality while continuing to pummel foes into submission. This approach is especially potent against the hulking monstrosities and tightly packed groups that define Avowed's most challenging encounters.
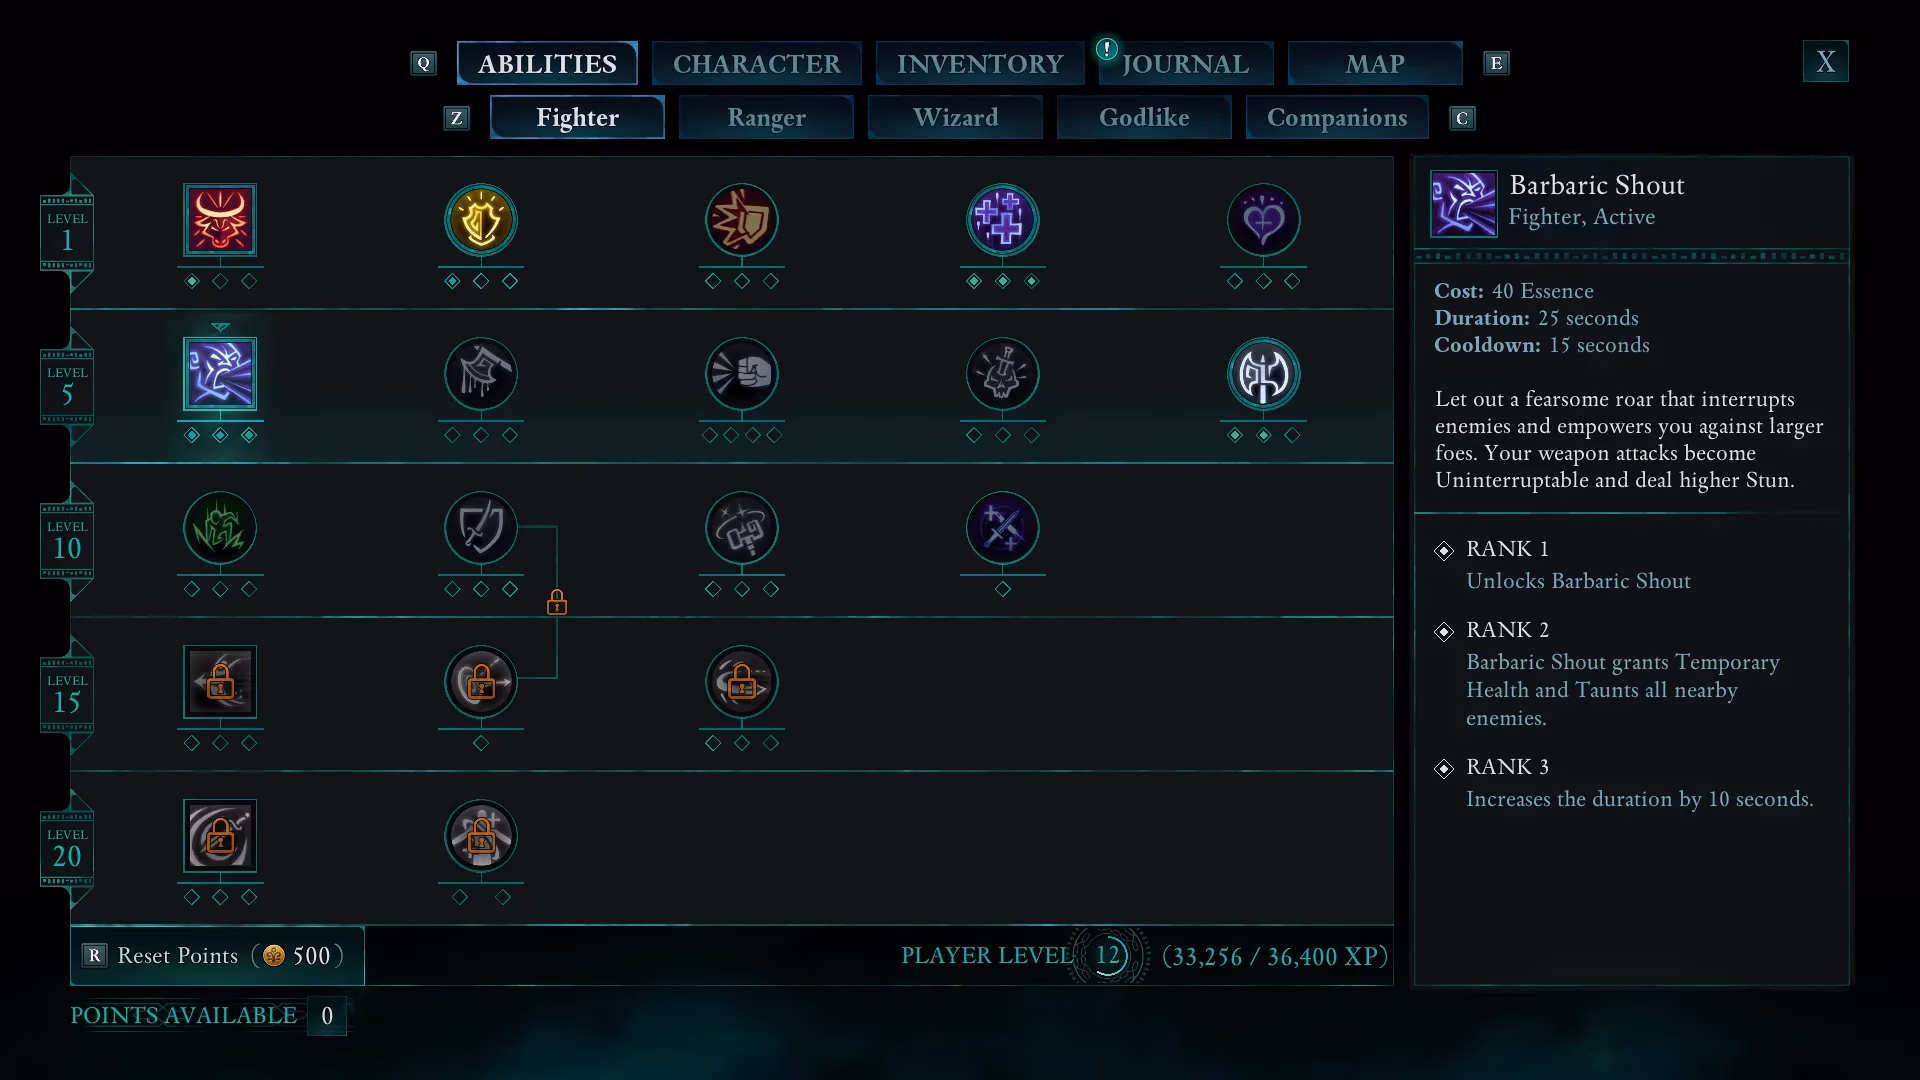
Central to the strategy is the Barbaric Shout ability. Once upgraded to Rank 3, this skill becomes the warrior's beating heart. For 25 seconds, every melee attack carries a crucial secondary effect: it will never glance off the armor of higher-level enemies and inflicts dramatically increased Stun damage. More importantly, the shout instantly grants Temporary Health equal to 100% of the user's maximum HP. This effectively doubles the fighter's health pool at the press of a button. The synergy with Constant Recovery (Rank 3) is what elevates the build from resilient to godlike. While the Temporary Health shield absorbs incoming damage, Constant Recovery ticks away in the background, rapidly filling the actual health bar. Players can retreat momentarily behind their barrier, heal to full, and then re-engage with no loss of momentum. This tandem removes the need for health potions in most fights and allows for an incredibly aggressive playstyle.
Skill Progression: Forging the Perfect Frontliner
Early investment should be laser-focused on maxing Barbaric Shout. Before anything else, reaching Rank 3 transforms a beginner warrior into a self-sustaining monster. Constant Recovery must also follow closely to Rank 3 to unlock its full potential for combat regeneration. With these two pillars in place, the remaining skill points can be distributed to augment damage output and quality of life, such as boosts to maximum stamina, critical hit chance, or one-handed/two-handed weapon specialization depending on preference.
A recommended priority list for the core abilities looks like this:
-
Barbaric Shout (Rank 3) – Absolute top priority. Temporary Health, stun boost, and anti-glancing.
-
Constant Recovery (Rank 3) – Enables healing under fire while the health shield persists.
-
Weapon Specialization – Choose your preferred weapon style (e.g., Axes or Greatswords) for bonus damage.
-
Additional Fighter Skills – Stamina increases, power attack upgrades, and any passive that improves stun buildup.
This structure ensures the fighter never suffers from the common melee pitfall of feeling squishy. Every encounter becomes a calculated brawl where the player controls the rhythm.
Gearing the Juggernaut: Armor, Accessories, and Stats
The right equipment further amplifies the build’s natural strengths. Since the warrior relies on absorbing damage to fuel its offense, armor choices prioritize automated protection and sustain over raw defensive numbers.
Body Armor: Stelgaer’s Pride
For those tackling Path of the Damned or other punishing difficulty modes,  Stelgaer’s Pride is a game-changer. This unique chestpiece automatically casts a free Barbaric Shout whenever the wearer takes damage equal to 30% of their maximum health in a single burst. Crucially, this trigger does not put the regular Barbaric Shout on cooldown. A player can let the armor activate a protective barrier, see it fade, and then immediately pop their manual Shout for another full Temporary Health shield. On lower difficulties, where enemies rarely deliver such large chunks of damage, a different heavy armor focused on Might or Constitution bonuses will serve better until the endgame.
Gloves and Boots
For gloves, the offensive power of  Vambraces provides a welcome boost to raw damage. However, if a situation demands even more staying power, the Steel Garotte Gauntlets (or similar pieces) offer extra health and stamina, which can be a lifeline in prolonged boss fights. Footwear is covered admirably by the Arcanist’s Boots, which grant bonus healing efficacy and a movement speed increase—both incredibly valuable for a build that wants to stay in the thick of combat while regenerating.
Trinkets and Rings
Accessory slots in Avowed are where the build finds some of its most elegant synergies. Whenever possible, prioritize items that increase Might, Constitution, and Resolve—the trinity of physical power and durability. As the warrior gathers unique trinkets, three stand out:
-
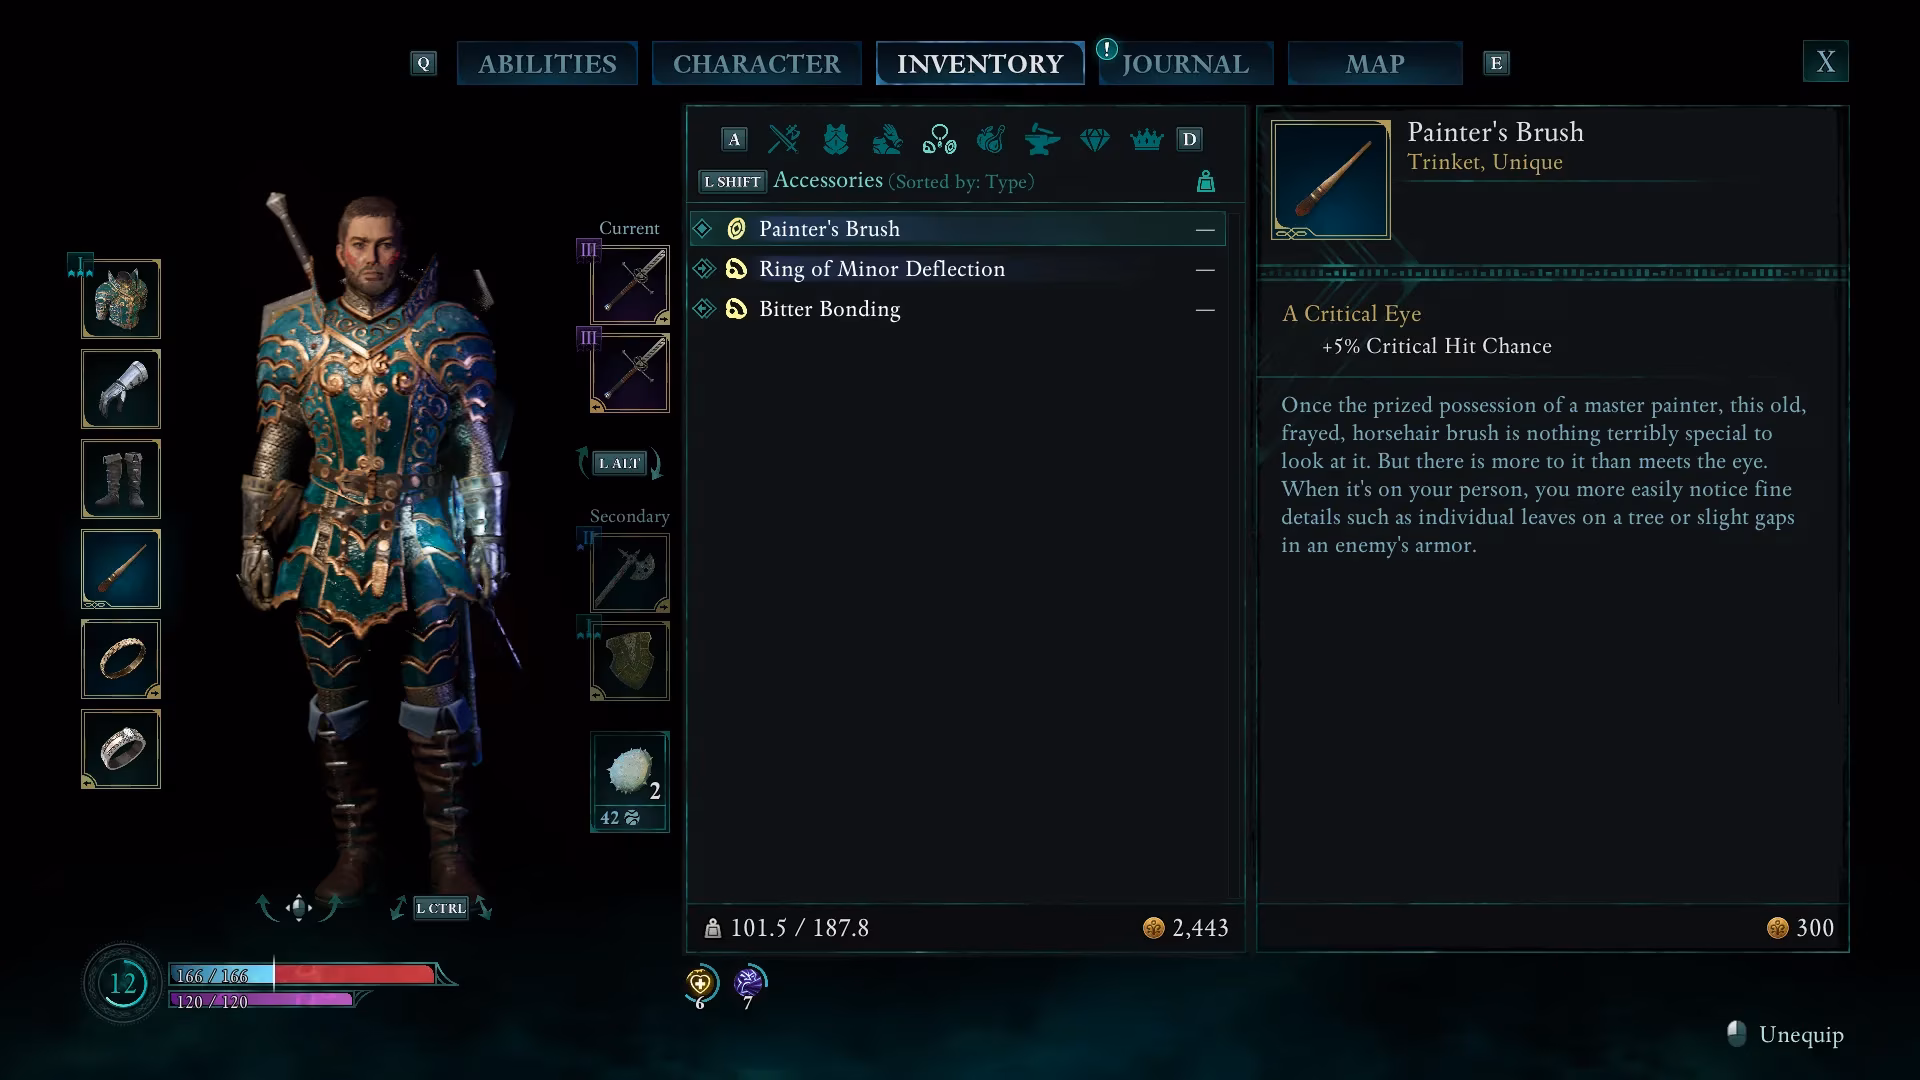
 Bitter Bonding – This accessory directly interacts with the Temporary Health barrier generated by Barbaric Shout, often returning additional effects when the shield absorbs damage. Its synergy with
  Painter’s Brush (which tends to scale with critical hits or status application) can create a cascade of bonuses.
 -
 Ring of Minor Deflection – A reliable option for reducing incoming physical damage, making the health shield last even longer. Players can swap this for a ring that boosts stun buildup if they feel safe enough.
Arsenal of Stuns: Weapon Choices and Early Acquisitions
While any melee weapon can work, the build truly sings when wielding instruments that maximize Stun damage. Axes and maces inherently carry higher stun ratings, making them perfect for locking down even the largest foes. Fortunately, several excellent uniques can be secured very early.
-
 Drawn in Winter – This powerful axe awaits in the Dawnshore region at the Watcher’s Mirror point of interest, east of Paradis. Its innate frost enchantment not only deals extra damage but often slows enemies, making it easier to build up stun with follow-up swings.
 -
Unflinching Duty – A flail or mace obtainable during the main quest encounter with the Dreamthrall Bear. It rewards players who confront danger head-on with excellent stun potential and a respectable damage profile.
-
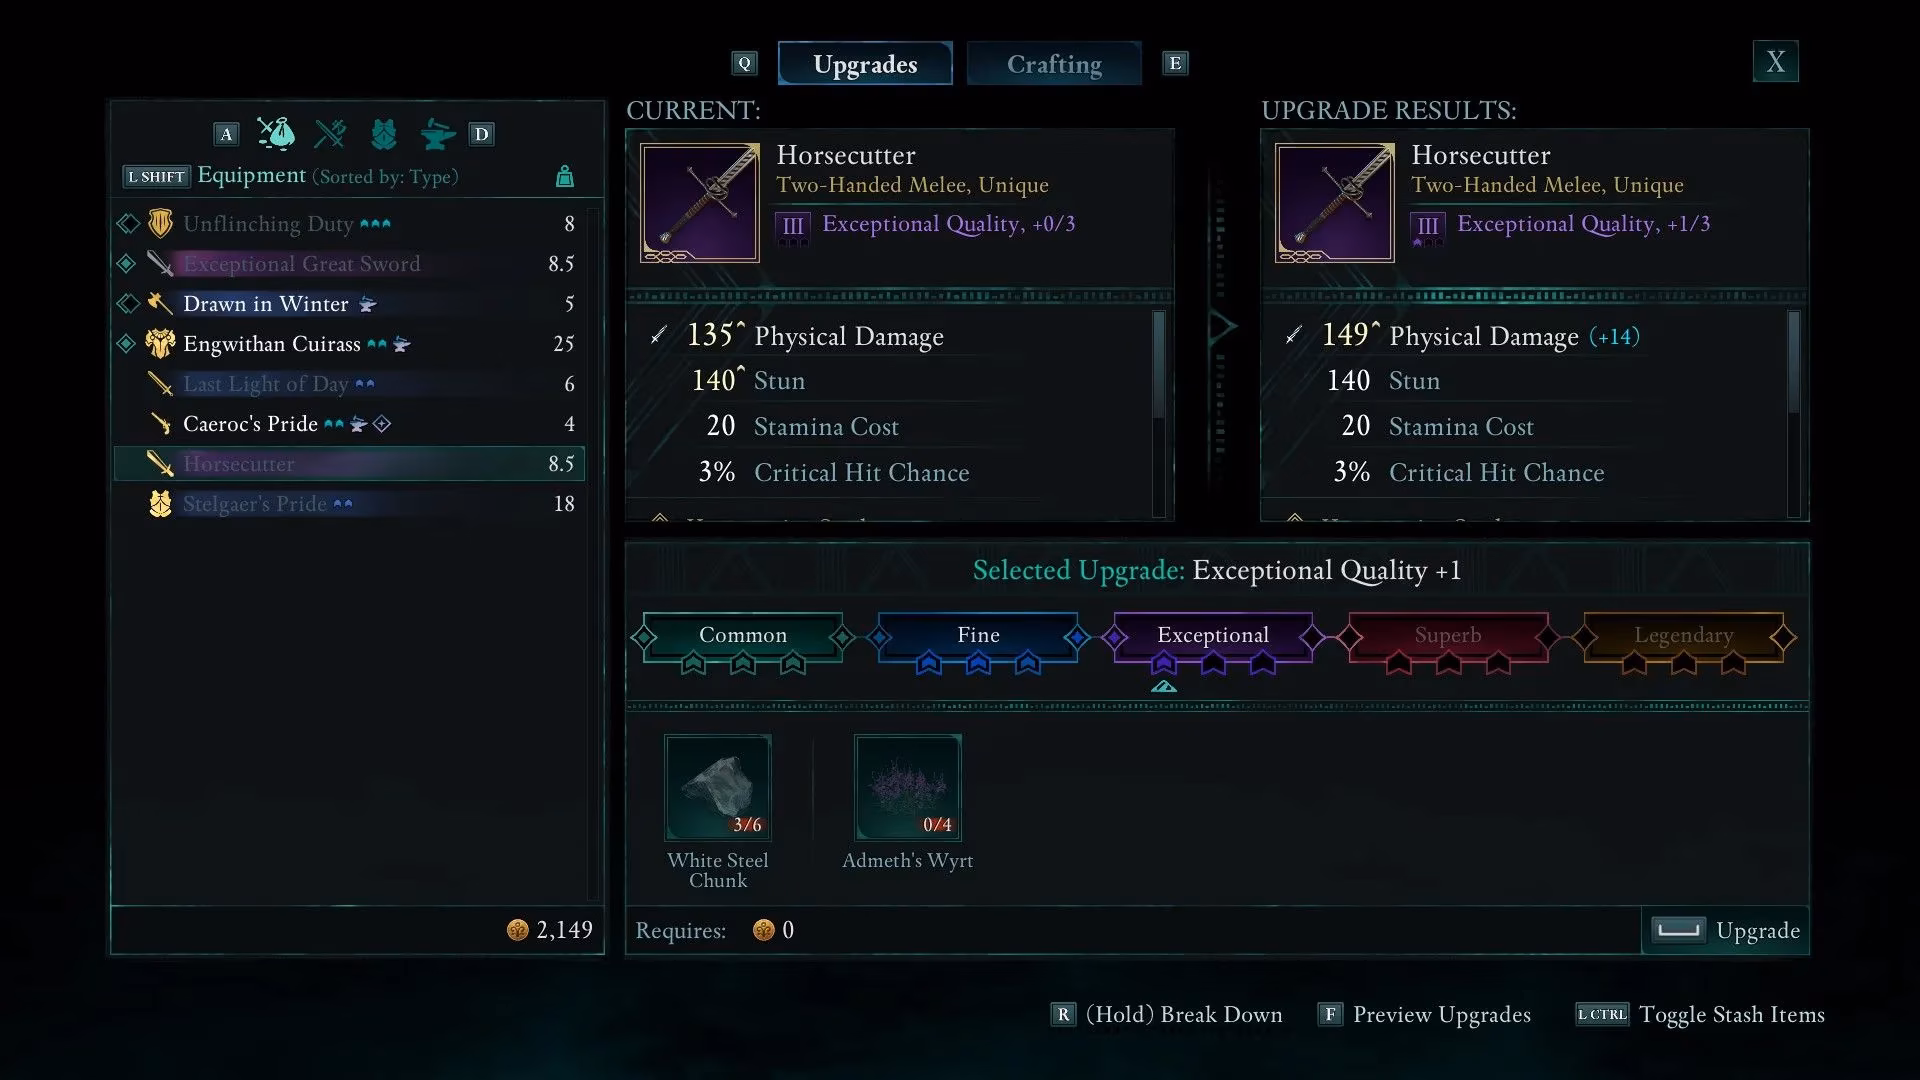
 Horsecutter – For those who prefer the sweeping arcs of a two-handed weapon, this greatsword lies in the second region, Emerald Stair. Seek a cove along the southern coast near Fior mes Iverno. There, a skeletal sovereign seated on a rocky throne challenges intruders; defeat his summoned minions to claim the blade. Horsecutter’s wide swings can stun multiple enemies at once, making it a crowd-control powerhouse.
Players should always keep their chosen weapon upgraded at the camp to ensure stun values keep pace with the escalating health pools of enemies. A fighter who fails to stun quickly is a fighter who takes unnecessary damage.

The Company You Keep: Ideal Companions
Since the build is entirely self-reliant for survival, the choice of companions becomes a matter of enhancing what already works or filling minor gaps. Two allies stand head and shoulders above the rest for this warrior.
Kai joins early and embodies the role of a stalwart tank. His ability to taunt enemies and lock down entire groups with crowd control abilities provides the perfect opening for the fighter to wade in and pile on stun without contest. He absorbs the initial volleys of damage that might otherwise overwhelm a temporary health shield.
Giatta is the other indispensable companion. She brings healing and damage reduction auras that stack beautifully with the build’s own recovery mechanics. Moreover, her knack for activating Essence Generators in the environment spares the fighter from having to juggle grenades or switch to a spellbook. This keeps the warrior’s focus squarely where it belongs: on the swing of a blade.
Playstyle Tips for the Path of the Damned
On the highest difficulty, the build’s reliance on triggered health shields from Stelgaer’s Pride becomes more frequent, as enemy damage output finally crosses the 30% threshold regularly. A typical engagement begins by letting Kai or the environment draw initial aggro. The fighter then dives in, builds stun on a priority target, and unleashes a special attack the moment the golden stun bar fills. If a heavy hit lands, the armor’s free Barbaric Shout activates, creating an instant safety net. Dodge major telegraphed attacks but otherwise trust the Temporary Health to keep you upright. Once the shield fades, pop a manual Shout to reset the buffer. This rhythm leaves very little room for panic.
Against bosses, stamina management becomes crucial. Always reserve enough stamina to block an incoming Power Attack, because while the health shield absorbs damage, a guard break can leave the fighter staggered and vulnerable. Stick close, circle the beast, and let constant stun buildup create openings for Giatta to top off any lost health.
Since 2025, Avowed’s community has refined this juggernaut approach, and it remains a top-tier way to experience the game without ever hurling a fireball or loosing an arrow. It proves that in a world of magic, sometimes the most formidable spell is an unbreakable spirit and a very large axe.
Comments